Lesson 39: Adding onclick Functionality with JavaScript
As you become stronger with JavaScript, you will naturally begin to create HTML elements dynamically (through JavaScript as the code is running) instead of creating static HTML (through HTML to be loaded with the page). Sometimes dynamic elements are needed because the number of elements that must be created are unknown when the page initially loads, such as with the number of divs used to display a randomly selected puzzle. Sometimes dynamic elements are not required, but they require much less code to use.
For instance, to add the possible letters (A through Z) for the player to choose from, you could add in 26 lines of HTML code similar to:
<div id="A" class="btnLetter">A</div>
However, this could be done in far fewer lines using JavaScript.
1. In the HTML, delete the unneeded text from the div elements.

2. Add a btnLetter style to be used for all the buttons with the letters from A to Z that the player will be able to click on.
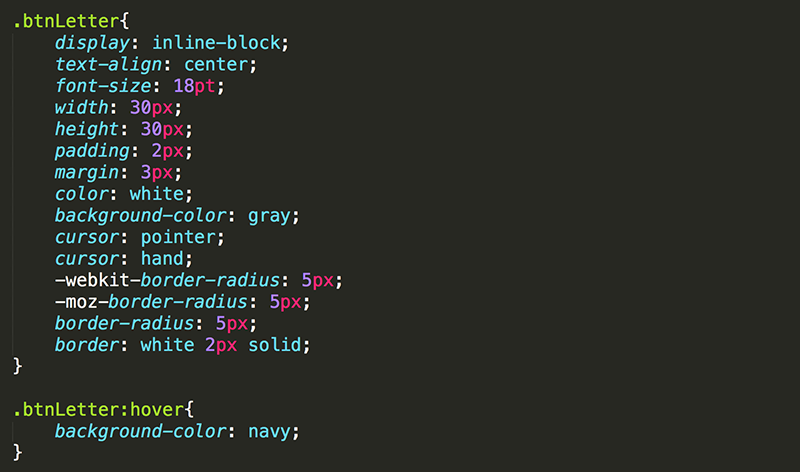
It is often useful to use meaningful prefixes when naming elements, variables, and CSS styles. The following are typical:
- btn - Buttons
- lbl - Labels (text the user does not enter)
- txt - Textboxes (text the user does enter)
- snd - Sounds
3. In the JavaScript, create alphabet as a String that holds all the letters of the alphabet. Remember, you can use this String as an Array of characters. In the initializeGame() function, add code to create a button div for each character of alphabet (applying the btnLetter class and adding the letter inside the div) and add the button to the div_available div.
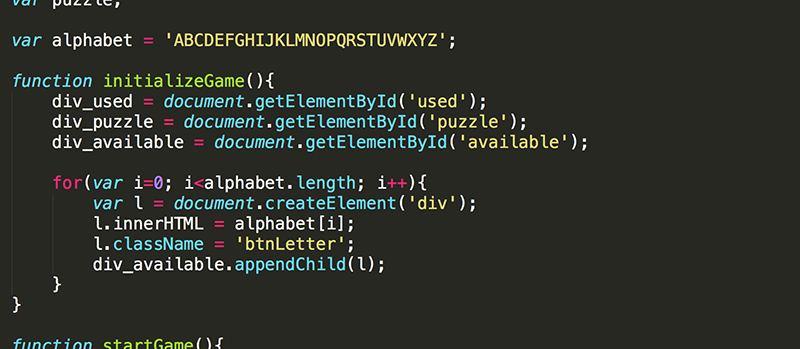
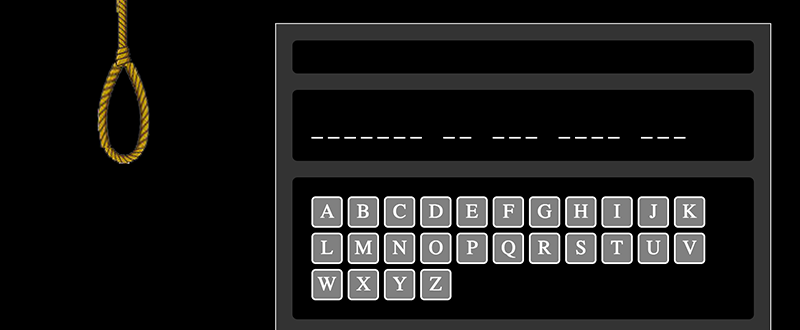
You should now have 26 buttons that all turn blue when the mouse hovers over them. Of course, nothing happens yet when the buttons are clicked on.
4. Add onclick functionality to each button as it is being created. Pass the element (this) to the selectLetter() function.

5. Create the selectLetter() function. For now, just have the function hide the element that was clicked on.

This is a perfect opportunity to see the difference between hiding an element using display vs using visibility.
6. Try both methods and use the one that provides the user experience your prefer.
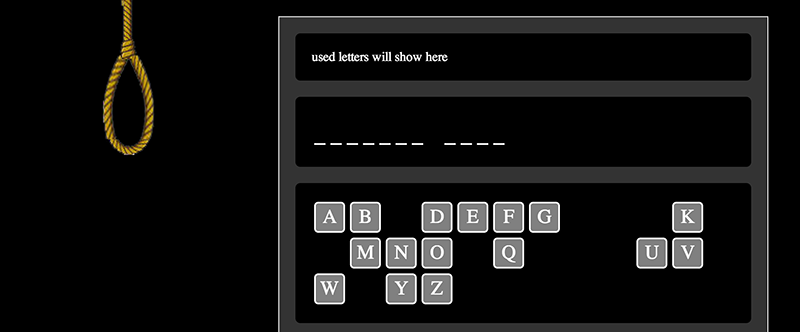
7. Create an lblUsed style that will be used to display all the letters that the player has already used. These will not be clickable so should not look like buttons.
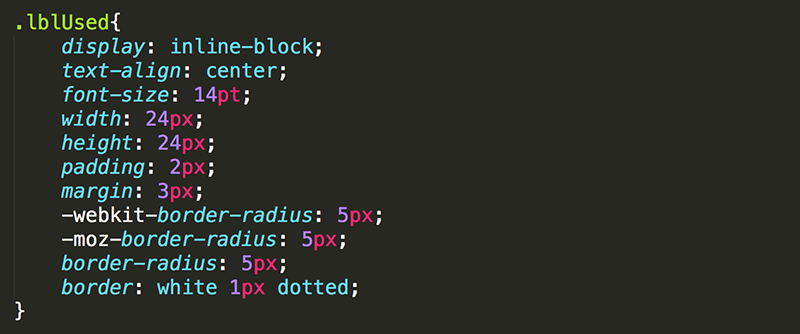
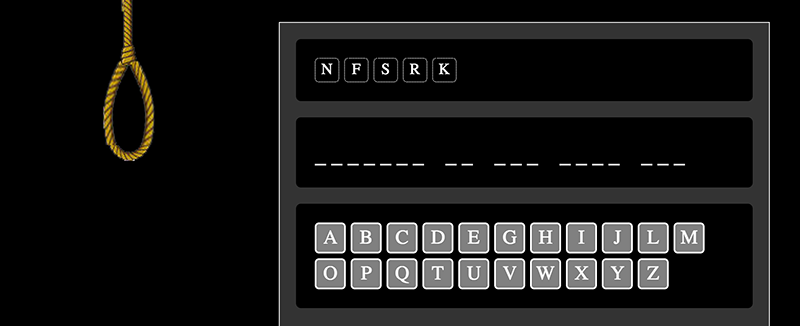
8. Modify selectLetter() so that it adds a label to div_used when a button is clicked.

Now, each time a button is clicked, the button disappears from the available buttons and the corresponding label appears in the list of used letters.
9. Add the audio elemets into the HTML for the sound files that were included in the project files.

10. Add the code to play the sounds to the selectLetter() function. Since you have not yet written any code to determine if the selected letter is in the puzzle, just play one of the sounds at a time to test them.

When clicking a button, the sound should play. However, if you click the buttons too quickly, the sound file does not play again. Here is what is happening. When the sound file is already playing, the play() function just tells the sound to continue playing, but does not restart it from the beginning. Only when the sound has completed playing does the play() function play the sound again from the beginning.
11. To fix this issue, set the currentTime property of the sound to 0 before calling play().

Now, when a button is pressed, the sound file is reset to the beginning (at time 0) and then plays.
Now if only there was a way to determine if the letter selected was in the puzzle or not...